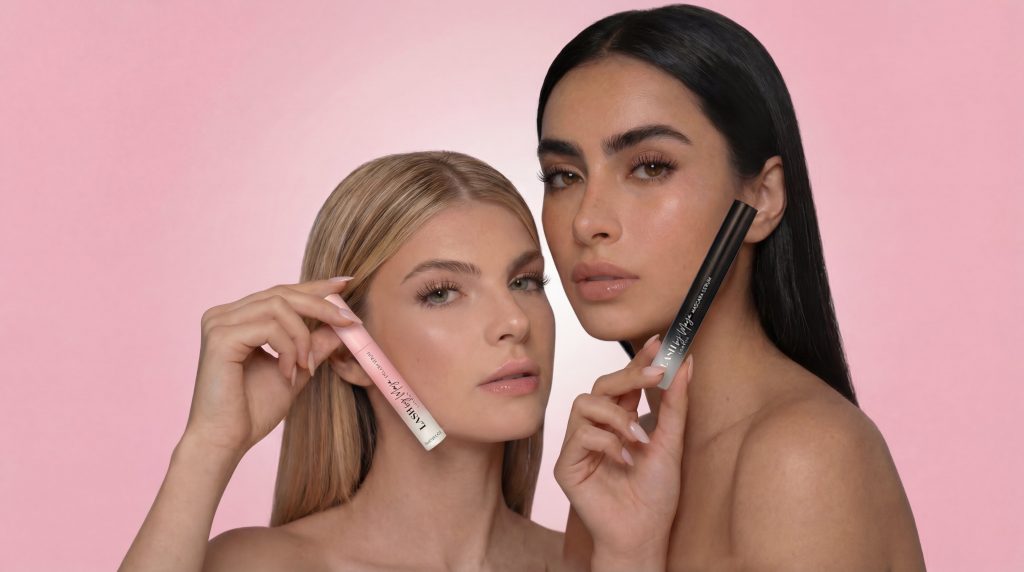

If you are anything like me, you have probably spent way too much time and money sitting in salon chairs every three weeks for fill appointments. For years, I was addicted to professional eyelash extensions. I loved the way they made my eyes pop without wearing a drop of makeup, but my bank account and my schedule definitely did not love the constant upkeep. Not to mention, waking up with a stray lash poking your eyeball is a special kind of morning misery.
A few months ago, I finally decided enough was enough. I kept seeing ads for DIY lash kits all over my social media feeds, and one brand in particular kept popping up: lash by maya. Naturally, being a bit skeptical of internet beauty trends, I had to dig in and see if the hype was actually real. After weeks of testing them out, wearing them to the gym, through long work days, and even crying at a wedding, I am ready to share my complete, unfiltered experience.
If you want to skip right to browsing what they have to offer, you can check them out here: Visit Official Website Now.
What Exactly Is Lash By Maya?
For those who haven’t fallen down the TikTok beauty rabbit hole yet, lash by maya is a brand specializing in at-home, cluster-style eyelash extensions designed to give you that high-end salon look without the price tag or the damage. Unlike traditional strip lashes that you glue on for a single night and throw away, or individual semi-permanent extensions that require professional isolation, these are designed to be applied underneath your natural lashes and can last anywhere from several days to over a week.
The concept intrigued me because my biggest issue with strip lashes was the band lifting at the inner corners—usually right in the middle of a dinner party or a zoom meeting. Because these clusters go *under* the natural lash line rather than sitting on top of the eyelid skin, the band completely disappears. It creates a seamless, natural transition that genuinely looks like you just walked out of a lash studio.
Unboxing and First Impressions
When my starter kit arrived in the mail, I tore into the package like a kid on Christmas morning. The packaging felt sleek and premium, which instantly gave me high hopes. Inside the box, everything was neatly organized: a tray of mixed-length lash segments, the bond and seal dual-ended tube, a specially designed applicator tweezer, and a remover for when it’s time to take them off.
I sat down at my vanity, propped up my magnifying mirror, and felt a sudden wave of intimidation. What if I glued my eyelids shut? What if they looked completely crooked? I am notoriously clumsy when it comes to detailed hand-eye coordination—winged eyeliner is basically an extreme sport for me.
The instructions recommended starting with clean, makeup-free lashes. I washed my face, made sure my eyelids were totally oil-free (this is crucial, trust me, or the bond won’t stick), and got to work.
My First Application: Trial, Error, and Triumph
The first eye took some patience. I brushed a thin layer of the bond just underneath the roots of my natural lashes, much like applying mascara, making sure not to coat the very tips. I waited about thirty seconds for it to get tacky—this step is super important, so don’t rush it!
Using the applicator tool, I picked up a medium-length cluster and gently placed it underneath my lashes, a millimeter or so away from my water line. The moment the segment touched the bond, it literally locked into place. I was shocked. It didn’t droop, it didn’t slide around, it just stayed put.
I worked my way from the outer corner inward, mixing lengths to create a customized, fluttery cat-eye effect. Once all the clusters were in place on my left eye, I gently squeezed them together with the applicator to seal the bond, and brushed a tiny bit of the sealer along the base to take away any remaining stickiness.
When I stepped back and looked in the mirror, my jaw dropped. It looked like I had just spent $150 and two hours at a salon. My husband walked past the bathroom door, stopped, did a double take, and said, “Wait, when did you get your lashes done?” When I told him I did them myself in ten minutes while watching a YouTube video, he didn’t believe me until I showed him the kit on the counter.
Ready to try them yourself? You can grab your starter set right here: Visit Official Website Now.
How Do They Hold Up in Real Life?
Getting them to look good on day one is one thing, but how do they survive daily life? That was my main concern. I am active—I work out four days a week, sweat through cardio sessions, wash my face twice a day, and sleep like a restless dragon who tosses and turns.
During my first test run, my lash by maya set lasted for a solid six days before I noticed one of the inner corners starting to feel a little loose. Honestly, I could have easily filled that one spot and kept going, but I wanted to take the whole set off to see how my natural lashes looked underneath and try a fresh application.
Here is a breakdown of how they handle specific situations:
- Sweat and Workouts: Zero issues. I ran 5 miles and did a hot yoga class, and they didn’t budge. Just make sure you give the bond at least 24 hours to fully cure before exposing them to heavy moisture or steam.
- Sleeping: Because the bands are so lightweight and flexible, I didn’t feel them poking into my eyelids while sleeping. I did switch to a silk pillowcase around day three just to minimize friction, which definitely helped keep them neat.
- Removal: When it was time to take them off, I used the oil-based remover included in the line, let it sit for about a minute, and they slid right off without taking a single natural lash with them. My natural lashes felt healthy and intact, which was a huge relief.
Real Customer Experiences
Of course, my experience is just one perspective. Before diving headfirst into any beauty product, I always love seeing what other everyday users have to say. Here is what a few other customers are sharing about their experience with lash by maya:
“I was paying $120 a month for fills and my natural lashes were starting to look so thin and brittle from the weight. Switching to lash by maya has saved me so much money, and my natural lashes are finally growing back healthy. It took me two tries to get the hang of applying them under the lash line, but now I can do both eyes in under seven minutes.” — Jessica T., Austin, TX
“As a busy mom of two toddlers, I don’t have time for salon appointments that take hours out of my day. These clusters are an absolute game changer. I put a fresh set on every Sunday night, and they easily last me through soccer practices, grocery runs, and date nights. Highly recommend!” — Megan R., Denver, CO
“I have super sensitive eyes that water up at the slightest irritation. Most glues make my eyelids swell or turn red. The bond from lash by maya is surprisingly gentle—no irritation at all, and they stay fluffy and clean for days.” — Chloe S., Seattle, WA
If you are tired of spending your weekends in salon chairs, check out the collection yourself: Visit Official Website Now.
Pros and Cons from My Personal Use
To give you the most well-rounded perspective possible, let’s look at the actual pros and cons I discovered after weeks of continuous wear.
The Pros:
- Incredible Cost Savings: Buying a kit costs a fraction of a single salon fill appointment. Over the course of a year, the savings are massive.
- Natural Appearance: Because the band goes underneath the natural lashes rather than on top, there is no visible strip line or heavy black adhesive showing.
- Comfortable Wear: The fibers are soft, lightweight, and don’t weigh your eyelids down. You honestly forget you’re wearing them.
- Customizable Styles: You can mix and match different lengths and curl intensities to create a subtle everyday look or a dramatic glam look depending on your mood.
- Time-Saving: Once you practice a couple of times, application takes less than ten minutes right at your bathroom vanity.
The Cons:
- Learning Curve: If you have never applied under-lash clusters before, the first attempt might feel a little awkward. It takes a tiny bit of patience to get comfortable with the placement.
- Maintenance Routine: You have to be mindful of oil-based skincare products around your eyes, as oil can break down the bond prematurely.
- Addictive: Once you start wearing them, going back to bare lashes feels almost impossible because you get so used to waking up ready to go!
Tips and Tricks for the Best Results
Through trial and error, I picked up a few handy pro tips that made my application process foolproof. If you decide to give lash by maya a try, keep these in mind:
- Curl your natural lashes first: Before applying any bond, give your natural lashes a gentle curl with an eyelash curler. This creates an upward angle that matches the trajectory of the clusters and makes blending effortless.
- Less is more with the bond: You do not need to glob the adhesive on. A very thin coat along the base of your natural lashes is more than enough to create a secure hold. Too much glue can get clumpy.
- Wipe your tweezers: Clean the applicator tweezers with a bit of rubbing alcohol after every use. If adhesive builds up on the tips, it will stick to the lash segments and pull them out of place when you try to let go.
- Map your eye first: Before applying glue, lay the different lengths out on your tray or arm to plan out where short, medium, and long segments will go for a balanced, eye-opening look.
Final Verdict
Switching my beauty routine up after years of stubborn habits is never easy, but trying out lash by maya turned out to be one of the best little beauty experiments I have done in a long time. It has saved me hours of sitting in traffic for salon appointments, kept my wallet significantly happier, and given me that effortless, wide-awake look every single morning without fail.
If you are on the fence about whether DIY extensions are worth the hype, or if you are tired of spending a fortune on salon upkeep, I genuinely recommend giving this kit a try. Take your time with the first application, watch a quick tutorial video, and enjoy the gorgeous results.
You can check out their official store, browse different styles, and pick up your starter kit here: Visit Official Website Now.